Home renovation projects are incredibly rewarding, but they often leave behind a trail of dust, debris, and disarray. As a dedicated DIYer or home improvement enthusiast, you’ve put your heart and soul into transforming your living space. Now, it’s time to restore order and cleanliness. This article will guide you through the essential steps to clean up effectively after completing your home renovation projects, ensuring that your newly renovated space shines as brightly as your creativity.
Gather Your Cleaning Supplies
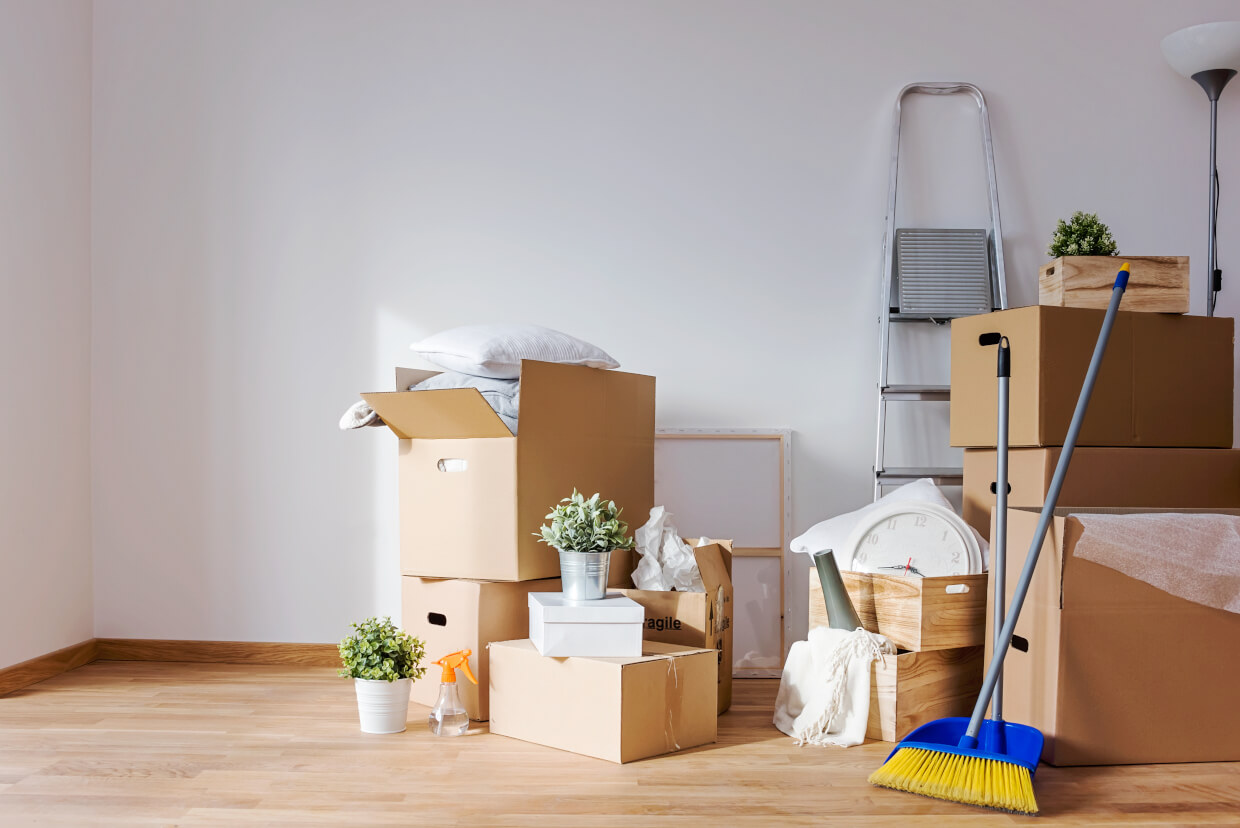
Before embarking on the cleaning process, it’s essential to arm yourself with the right tools and supplies to ensure a thorough and efficient cleanup. Here’s a comprehensive list of items you’ll need to have on hand before you begin:
- Garbage Bags: Sturdy garbage bags are a must for collecting debris, dust, and any waste materials. Opt for heavy-duty bags that can handle the weight and size of the items you’ll be disposing of.
- Brooms and Dustpans: A quality broom and dustpan combo is essential for sweeping up larger debris and dirt particles from floors and surfaces.
- Mops and Buckets: Mops equipped with microfiber or mop pads are excellent for cleaning floors effectively. Have a bucket with water and cleaning solution ready to dampen the mop head.
- Microfiber Cloths: These specialized cloths are adept at capturing dust and dirt without leaving behind lint or scratches. They are ideal for wiping down surfaces and achieving a streak-free shine.
- Vacuum Cleaners with HEPA Filters: Invest in a vacuum cleaner equipped with a High-Efficiency Particulate Air (HEPA) filter. HEPA filters trap fine particles, allergens, and dust, ensuring the air remains clean during and after vacuuming.
- All-Purpose Cleaners: Keep a range of all-purpose cleaners suitable for different surfaces such as countertops, appliances, and walls. Make sure they are formulated to cut through grease, grime, and stains effectively.
- Protective Gear: Safety is paramount during cleanup. Equip yourself with gloves to protect your hands from potentially harmful chemicals and materials. Wear masks to prevent inhaling dust and particles, and consider safety goggles to shield your eyes from debris.
- Sponges and Scrub Brushes: Have an assortment of sponges and scrub brushes to tackle tough stains and residue on various surfaces, including sinks, tubs, and fixtures.
- Plastic Scraper: A plastic scraper comes in handy for gently removing dried paint or other stubborn substances from glass, windows, and other surfaces without causing damage.
- Trash Cans and Recycling Bins: Set up designated areas for regular trash and recyclables to ensure proper waste disposal and recycling.
- Labeling Supplies: If you have leftover paint or other materials, labeling them with the project name, date, and color can help you keep track of them for future use.
- Cleaning Solutions: Depending on the specific cleaning tasks, gather specialized cleaning solutions like glass cleaners, tile and grout cleaners, stainless steel polish, and wood cleaners.
- Storage Containers: Transparent storage containers are ideal for organizing smaller items, tools, and leftover materials for future projects.
- Extension Cords and Power Outlets: Make sure you have easy access to power outlets and extension cords for vacuum cleaners and other powered cleaning tools.
- Ladder: If your renovation involved work at height, have a sturdy ladder on hand to access high surfaces safely.
By ensuring you have these cleaning supplies readily available, you’ll set yourself up for a successful and efficient post-renovation cleanup. Proper preparation will not only make the process smoother but also contribute to a cleaner and safer environment as you restore your living space to its former glory.
Note: Remember to use each tool and supply according to its intended purpose and manufacturer’s guidelines to ensure safety and optimal cleaning results.
Safety First: Preparing the Space
As you embark on the post-renovation cleanup journey, prioritizing safety is non-negotiable. With a mix of debris, dust, and potential hazards lurking in your recently transformed space, taking precautionary measures is essential. Here’s how to ensure a secure environment as you get ready to tackle the cleanup process:
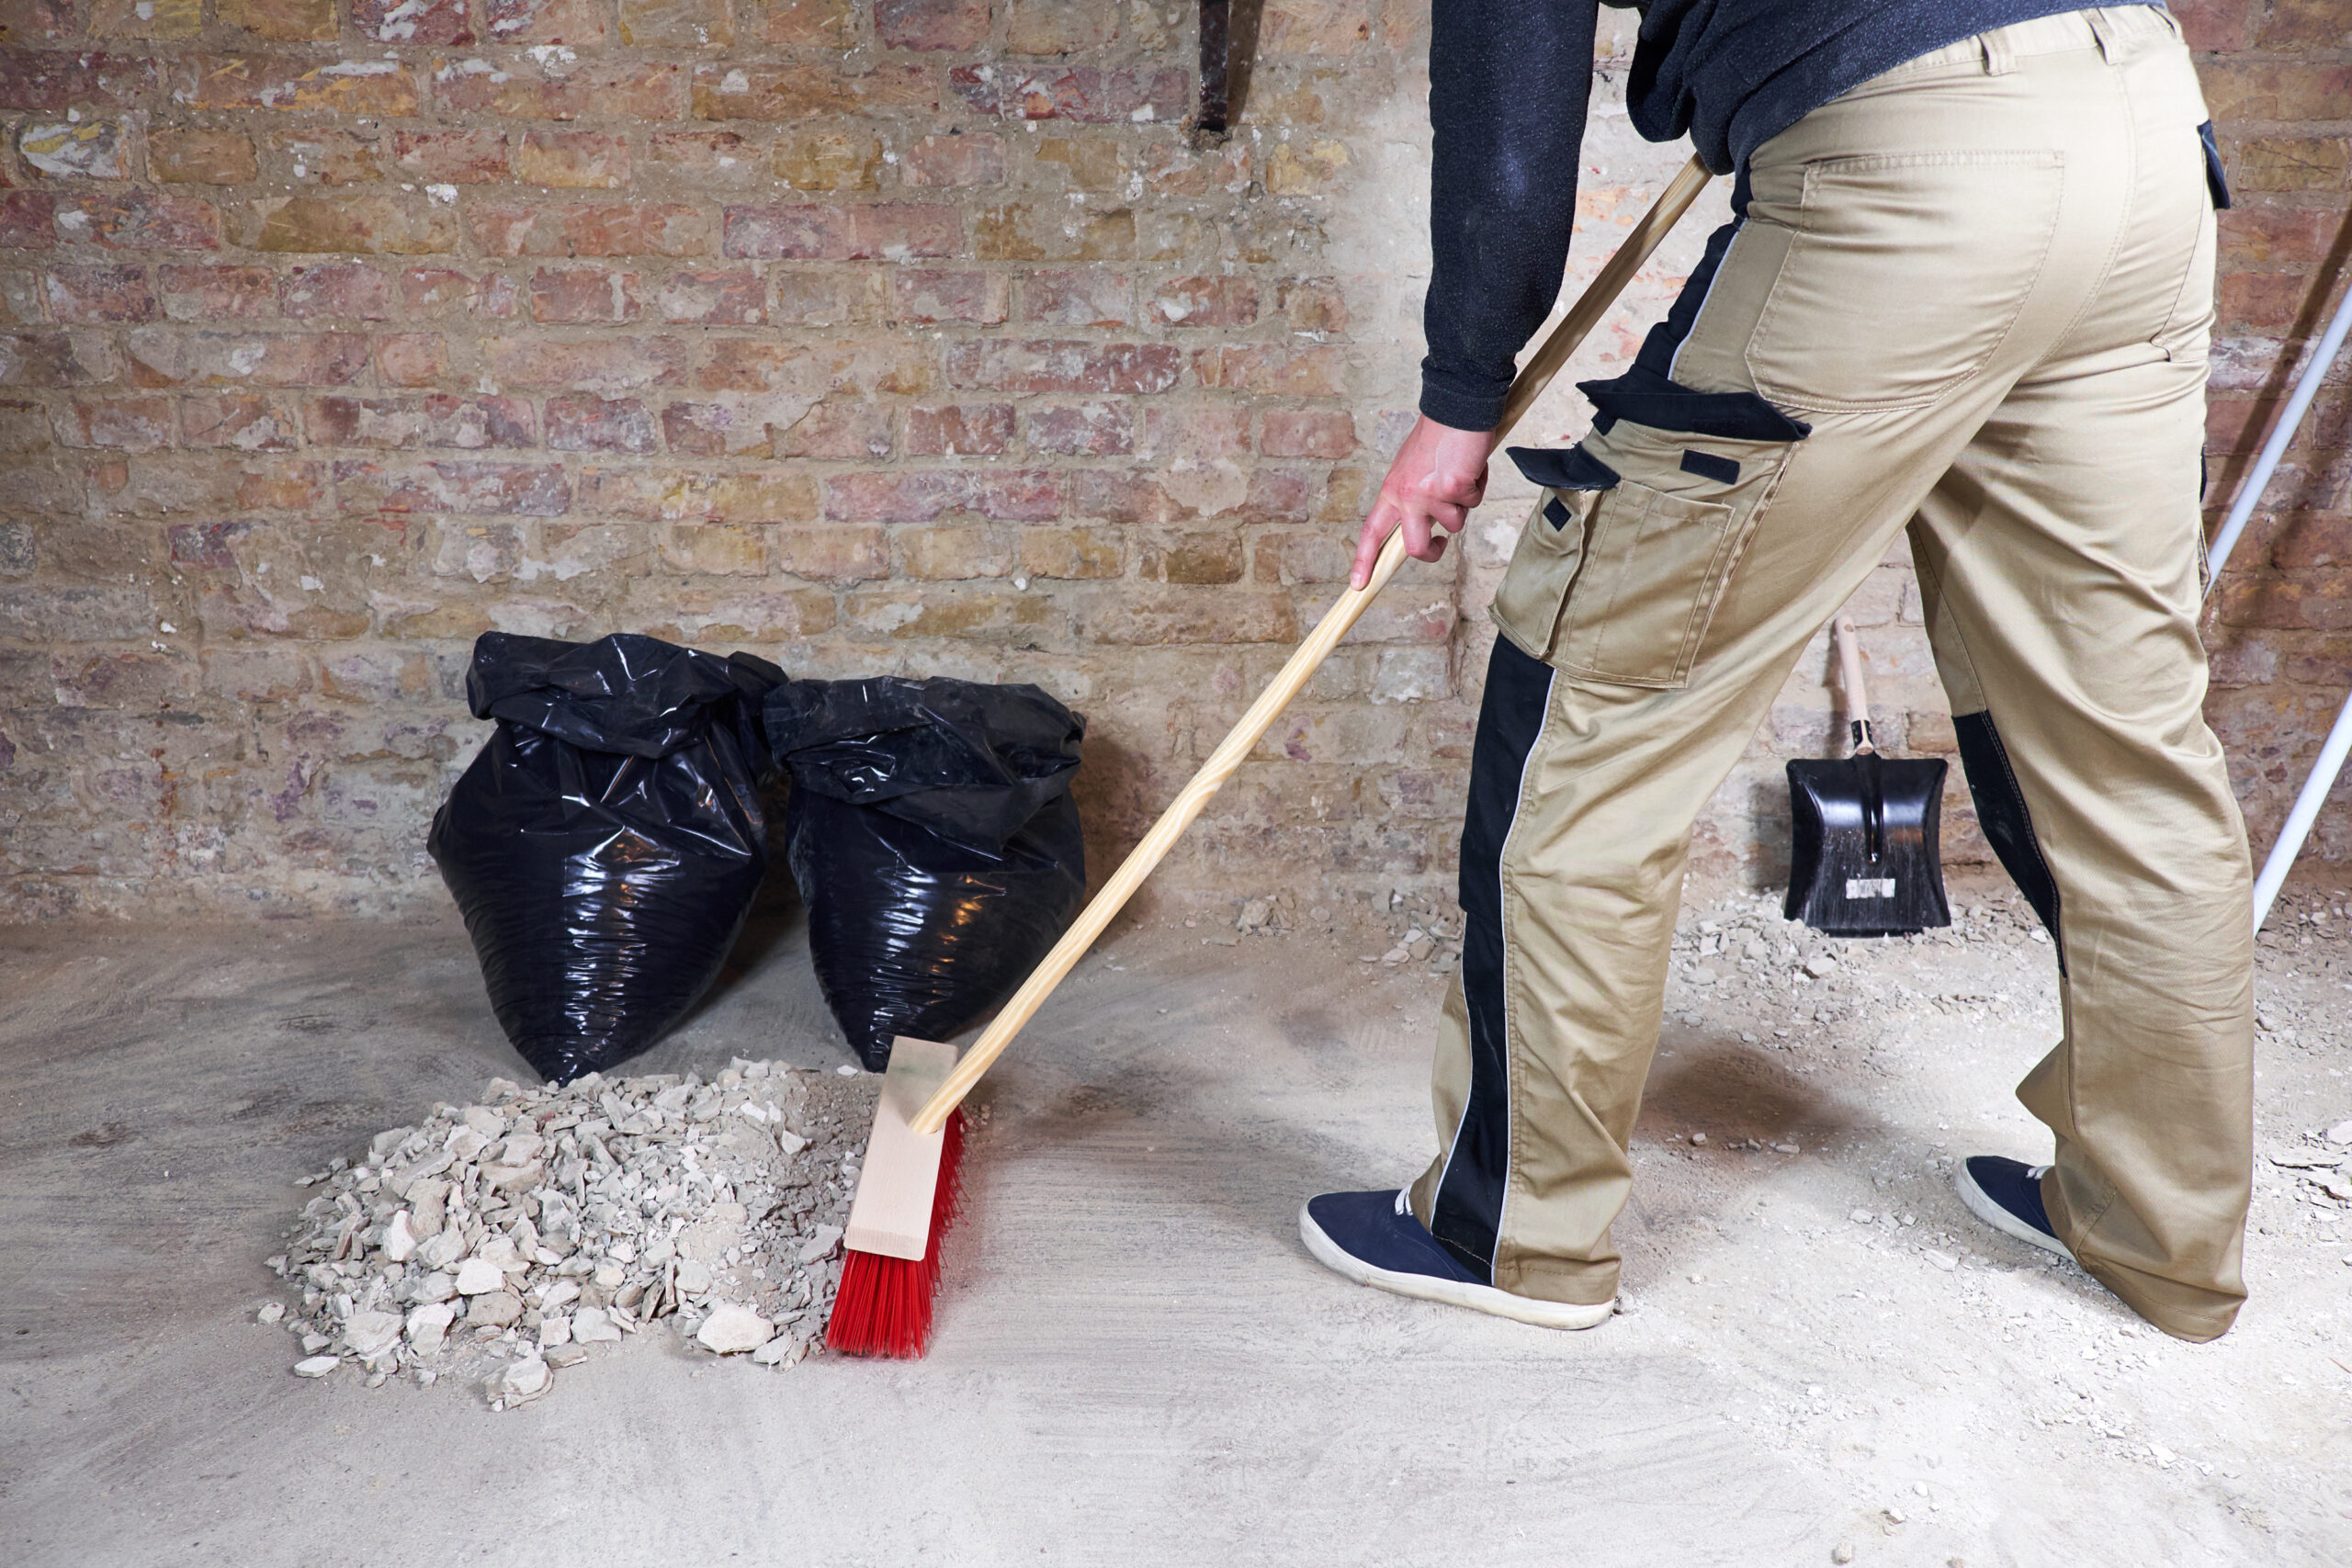
Removing Large Debris and Hazardous Materials
Before diving into any cleaning tasks, address the more conspicuous safety concerns. Start by meticulously removing any sizeable debris left behind from the renovation process. Nails, screws, splintered wood, and other sharp objects pose risks not only to your safety but also to the condition of your space.
Ensure that the floor, countertops, and surfaces are free of these potential stumbling blocks. Utilize a gloved hand, a magnetic sweeper, or a broom to carefully gather and dispose of these materials. This initial step lays the foundation for a safe and hassle-free cleanup process.
Ventilation: An Essential Step
Proper ventilation is a key aspect of ensuring your safety during the post-renovation cleanup. If your renovation involved using paint, adhesives, or other strong chemicals, opening windows and doors is crucial. Adequate ventilation helps disperse fumes and ensures that harmful airborne particles don’t linger in the air you breathe.
By allowing fresh air to circulate through the space, you minimize the risk of respiratory irritation and ensure a healthier atmosphere. Whether it’s a mild breeze or a more robust cross-ventilation strategy, promoting airflow is a safety measure that cannot be overlooked.
Protective Gear: Your Armor Against Hazards
Shielding yourself from potential hazards is paramount as you prepare for the cleanup. Wearing appropriate protective gear is akin to donning armor that safeguards you against dust, debris, and potentially harmful substances. Here’s the essential protective gear to consider:
- Safety Goggles: These protect your eyes from dust, debris, and any particles that might become airborne during the cleanup process. Safety goggles provide a clear line of sight while preventing any foreign objects from causing eye injuries.
- Gloves: Sturdy gloves are your hands’ best friends. They safeguard your skin from cuts, splinters, and the risk of exposure to chemicals or other substances. Opt for gloves that fit well and provide ample dexterity for your tasks.
- Masks or Respirators: Depending on the extent of dust and airborne particles, choose a mask or respirator that offers adequate protection. N95 respirators are highly effective in filtering out particles, ensuring that you breathe cleaner air while cleaning up.
Embracing these safety precautions ensures that you’re well-equipped to navigate the cleanup process with confidence and minimal risk. As you remove hazards, enhance ventilation, and don protective gear, you create an environment where your well-being takes precedence. This commitment to safety not only safeguards you but also allows you to focus on the task at hand: restoring your space to its pristine glory.
Note: Prioritize your safety at all times. If you encounter potential hazards that require professional attention, don’t hesitate to seek the expertise of skilled professionals who can address the situation safely and effectively.
Dust and Debris Removal
The aftermath of a home renovation project often brings with it a blanket of fine dust and debris that settles on every surface, transforming your newly transformed space into a temporary construction zone. Dust removal is a critical step in the post-renovation cleanup process, as it not only enhances the visual appeal of your space but also contributes to better indoor air quality. Here’s how to effectively tackle this task and bid farewell to the lingering remnants of renovation:
Investing in a HEPA-Filtered Vacuum Cleaner
When it comes to dust removal, not all vacuum cleaners are created equal. Investing in a vacuum cleaner equipped with a High-Efficiency Particulate Air (HEPA) filter is a game-changer. HEPA filters excel at capturing even the tiniest dust particles, ensuring that what’s sucked up stays trapped within the filter, rather than being recirculated back into the air you breathe.
As you vacuum, pay special attention to various surfaces—walls, ceilings, floors, and even furniture. Dust has an uncanny ability to find its way into every nook and cranny, so a thorough approach is necessary to eliminate it completely.
Comprehensive Vacuuming: A Multifaceted Approach
Begin the dust-removal process by systematically vacuuming each area of your space. Start from the top—ceilings and walls—and work your way down to the floors. For ceilings and high surfaces, consider using an extension wand to reach areas that might otherwise be overlooked.
When vacuuming floors, pay attention to corners, edges, and underneath furniture. These often-neglected areas can accumulate a surprising amount of dust. By diligently moving furniture and vacuuming beneath, you ensure that no dust particle goes unaddressed.
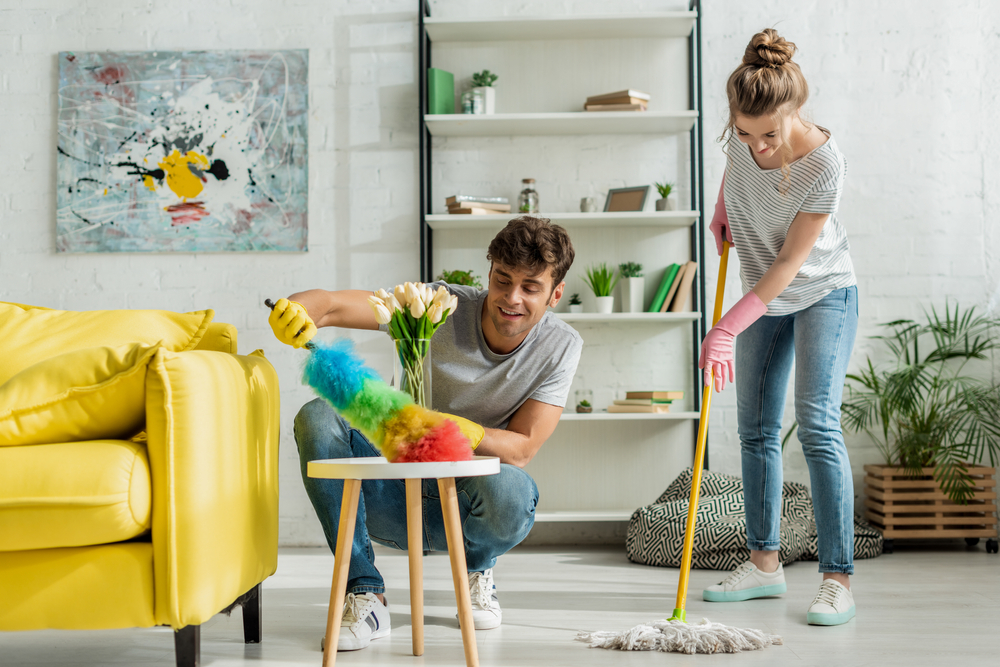
Microfiber Cloths: The Final Sweep
Following the vacuuming phase, give your space a final sweep with the aid of microfiber cloths. These specialized cloths possess an inherent ability to attract and trap dust, leaving surfaces gleaming without leaving behind lint or scratches.
Dampen the microfiber cloth with water or an appropriate cleaning solution and gently wipe down all surfaces, including countertops, furniture, and fixtures. This step not only picks up any residual dust that might have escaped the vacuum’s grasp but also imparts a polished finish to your efforts.
By meticulously combining the power of a HEPA-filtered vacuum cleaner with the finesse of microfiber cloths, you embark on a journey towards achieving a dust-free haven. As the layers of dust gradually disappear, the true beauty of your renovated space emerges, revealing your hard work in all its glory.
Note: When using cleaning solutions, ensure that they are compatible with the surfaces you’re cleaning. Always test on a small, inconspicuous area before applying to a larger surface to prevent any potential damage or discoloration.
Cleaning Surfaces and Fixtures
As the dust settles and the debris is cleared, the time has come to breathe new life into your renovated space by giving surfaces and fixtures the attention they deserve. Cleaning these elements not only enhances their appearance but also contributes to the overall cleanliness and comfort of your environment. Here’s how to approach this task and achieve surfaces that gleam with renewed brilliance:
Selecting Gentle Cleaners
The choice of cleaners plays a crucial role in preserving the integrity of your surfaces and fixtures. Opt for gentle cleaners that effectively remove dirt, grime, and residue without causing damage. When faced with painted surfaces, exercising caution is paramount to prevent any unintended harm.
For surfaces such as walls, cabinets, and countertops, a mild soap solution is an excellent choice. This solution effectively removes dust, fingerprints, and light stains, leaving your surfaces clean and refreshed. Avoid abrasive cleaners that can compromise the finish of your surfaces.
Caring for Painted Surfaces
If your renovation involved fresh coats of paint, extra care is needed to maintain their vibrancy. A mild soap solution—created by mixing a small amount of gentle dish soap with warm water—is your ally. Gently dampen a soft cloth with this solution and wipe down painted surfaces. This method effectively lifts dirt and grime while preserving the integrity of the paint.
Remember to avoid excessive moisture, as it can potentially compromise the paint’s adhesion. Patience and a gentle touch are your allies when tending to painted surfaces, ensuring that they remain immaculate long after the renovation dust has settled.
Restoring Shine to Fixtures and Hardware
Fixtures and hardware are often the jewels that accentuate your living space. Over time, they can accumulate fingerprints, water spots, and general wear. To restore their shine and luster, a mixture of water and vinegar proves remarkably effective.
Combine equal parts water and white vinegar in a spray bottle. Lightly mist the solution onto fixtures such as faucets, handles, and knobs. Wipe down these surfaces with a soft cloth, gently buffing to reveal their inherent brilliance. This technique not only removes smudges but also helps dissolve mineral deposits, leaving fixtures looking polished and renewed.
An Investment in Elegance
Cleaning surfaces and fixtures post-renovation is an investment in elegance—an opportunity to showcase your hard work and attention to detail. As you apply gentle cleaners to painted surfaces and utilize the water and vinegar mixture on fixtures, you not only cleanse but also reveal the true allure of your renovated space.
By choosing cleaners wisely and embracing techniques that safeguard surfaces and fixtures, you elevate your space from merely clean to breathtakingly pristine. This step, though seemingly small, is essential in the grand narrative of your post-renovation cleanup, ensuring that the final result mirrors the vision that inspired your renovation journey.
Note: Always perform a spot test in an inconspicuous area before using any cleaner on a larger surface to prevent any potential damage or discoloration.
Tackling Paint and Paint Supplies
Paint is the transformative medium that breathes new life into your space, and as you complete your home renovation project, proper care of your paint and paint supplies is essential. Whether you have leftover paint or used paintbrushes and rollers, understanding how to handle them post-renovation is crucial to preserving their quality and ensuring they’re ready for future endeavors. Here’s how to tackle paint and its associated supplies with care and precision:
Proper Storage of Leftover Paint
Leftover paint holds the potential for touch-ups, accent walls, or even future projects. However, improper storage can lead to paint drying out and becoming unusable. To prevent this, adhere to the following storage guidelines:
- Seal the Container: Ensure the paint container is properly sealed to prevent air from entering and causing the paint to dry out.
- Keep it Upright: Store the paint container in an upright position to prevent leakage and maintain consistency.
- Avoid Extreme Temperatures: Store paint in a cool, dry place, away from direct sunlight and extreme temperatures. This helps prevent color and texture changes.
- Label and Date: Label the container with the paint color, the room it was used in, and the date of storage. This information will be invaluable when you need to use the paint again.
By following these storage practices, you ensure that your leftover paint remains viable for future touch-ups and projects, saving you time and money down the line.
Extending the Lifespan of Paintbrushes and Rollers
Paintbrushes and rollers are the artist’s tools of the renovation world. Properly cleaning and storing them after use prolongs their lifespan and maintains their quality. Here’s how to care for them:
- Immediate Cleaning: After you’re done painting, clean your brushes and rollers immediately. Leaving paint to dry on them makes cleaning more challenging and can lead to irreversible damage.
- Latex Paint Brushes: For brushes used with latex paint, wash them using warm, soapy water. Gently work the bristles to remove paint and rinse thoroughly. Repeat until the water runs clear.
- Oil-Based Paint Brushes: Brushes used with oil-based paints require specific solvents for cleaning. Check the paint can for recommended solvents, and follow their guidelines for proper cleaning.
- Rollers: Rinse paint rollers under running water until the water runs clear. Squeeze out excess water and allow them to air dry.
Safeguarding Investments for the Future
Caring for your paint and paint supplies post-renovation is a wise investment in your future DIY projects. By properly storing leftover paint, cleaning your brushes and rollers, and ensuring their longevity, you’re setting the stage for successful future endeavors. These practices not only save you money but also ensure that you’re always well-prepared to undertake new painting adventures with the same level of precision and finesse that characterized your renovation.
Note: Always follow the manufacturer’s instructions for cleaning and storing paintbrushes, rollers, and paint to avoid damage and ensure the best results.
Proper Disposal of Materials
The culmination of a successful home renovation project often leaves behind a trail of materials, some of which require careful consideration when it comes to their disposal. The responsible management of waste not only reflects your commitment to the environment but also ensures the safety and cleanliness of your living space. Here’s how to approach the proper disposal of materials with conscientiousness and care:
Sorting for Responsible Disposal
The first step in responsible waste management is to categorize materials based on their nature and potential impact on the environment. Consider the following categories:
- Recyclables: Separate materials that can be recycled, such as cardboard, paper, plastics, and glass. These items can often find new life in the recycling process, reducing their impact on landfills.
- Hazardous Waste: Identify any materials that are considered hazardous, such as paints, solvents, batteries, and certain electronic items. These materials require special handling due to their potential harm to the environment and human health.
- Regular Trash: Items that do not fall into the recyclable or hazardous waste categories can be classified as regular trash. Properly bag and seal this waste to prevent contamination.
Seeking Proper Disposal Sites
Once materials are sorted, it’s essential to locate appropriate disposal sites that can manage each category responsibly. Here’s what to consider:
- Recycling Centers: Research local recycling centers that accept the materials you’ve classified as recyclables. Many communities offer drop-off locations for items like cardboard, paper, plastic, and glass.
- Hazardous Waste Facilities: Hazardous materials require special handling to prevent environmental harm. Find hazardous waste facilities or collection events in your area where you can safely dispose of paints, chemicals, batteries, and other potentially harmful items.
- Municipal Services: Regular trash can often be managed by municipal waste collection services. Ensure you follow local guidelines for proper disposal, such as using designated bins or bags.
Minimizing Environmental Impact
The act of responsible waste disposal is a direct reflection of your commitment to minimizing your environmental footprint. By taking the time to sort materials and seek appropriate disposal sites, you actively contribute to the reduction of landfill waste, the prevention of pollution, and the protection of ecosystems.
A Lasting Legacy of Care
As you meticulously sort and dispose of materials, you establish a legacy of care for both your living space and the planet. The responsible disposal of waste not only ensures a clean and organized environment but also demonstrates your dedication to the well-being of the world we share.
Note: Always follow local regulations and guidelines for waste disposal. For hazardous waste, consult local authorities or waste management facilities for specific instructions on safe disposal methods.
Kitchen and Bathroom Deep Cleaning
Among the bustling spaces within your home, the kitchen and bathroom stand as high-traffic areas that demand meticulous attention and care. Post-renovation, these spaces are deserving of a thorough and revitalizing deep clean to restore their functionality and aesthetics. Here’s how to delve into the cleaning process, giving your kitchen and bathroom the rejuvenation they warrant:
Comprehensive Appliance and Cabinet Care
The kitchen is a hub of culinary creativity, and its appliances and cabinets bear the evidence of its vibrant activity. Here’s how to extend your caring touch to these elements:
- Appliance Cleaning: Wipe down appliances such as stovetops, ovens, microwaves, and refrigerators. Remove grime, food residue, and splatters. Pay extra attention to handles and knobs, which often accumulate fingerprints and grease.
- Cabinet Revival: Cabinets can accumulate dust and grime, dulling their appearance. Wipe down cabinet surfaces with a mild cleaner that won’t harm the finish. Don’t forget to clean both the interior and exterior surfaces.
Restoring Surfaces to Their Glory
Countertops and surfaces in both the kitchen and bathroom are workstations that deserve a clean slate post-renovation. Here’s how to achieve this:
- Countertop Care: Use a suitable cleaner to wipe down countertops, removing dust, dirt, and any remnants of renovation. Choose a cleaner that’s safe for the material of your countertops—whether granite, quartz, laminate, or another surface.
- Sink and Tub Renewal: Sinks and tubs can accumulate stubborn stains and grime. Use appropriate cleaning solutions and scrubbing tools to tackle these areas. For example, a mixture of baking soda and water can work wonders on sinks, while bathroom tubs might benefit from a specialized cleaner.
Focusing on Details for a Fresh Start
As you embark on the deep cleaning journey for your kitchen and bathroom, remember that details matter. Addressing nooks, crannies, and often-overlooked areas can make a significant difference:
- Faucets and Fixtures: Don’t forget to clean and polish faucets, showerheads, and other fixtures to restore their shine.
- Backsplashes: If your kitchen or bathroom has a backsplash, clean it to remove any splatters or residue. Choose an appropriate cleaner based on the material.
- Grout: For tiled surfaces, tackle grout lines using a specialized grout cleaner or a mixture of baking soda and water. Scrub gently to remove stains and brighten the grout.
A Culmination of Care
Deep cleaning the kitchen and bathroom post-renovation is a culmination of your dedication to both functionality and aesthetics. As you meticulously tend to appliances, surfaces, and fixtures, you pave the way for these spaces to once again become vibrant centers of daily life. With each scrub and wipe, you restore the heart of your home—the kitchen—and the retreat of tranquility—the bathroom—to their former glory.
Note: Always use cleaning solutions that are appropriate for the specific materials in your kitchen and bathroom. Test new cleaning products on a small, inconspicuous area before applying them to larger surfaces.
HVAC System Maintenance
As the final strokes of your renovation masterpiece settle, it’s crucial not to overlook a critical element that often goes unnoticed—the HVAC (Heating, Ventilation, and Air Conditioning) system. Your HVAC system plays a pivotal role in maintaining indoor air quality and comfort. After renovations, it can be especially susceptible to circulating dust and particles. To ensure the air in your home remains fresh and healthy, it’s essential to prioritize HVAC maintenance. Here’s how to do it effectively:
Changing Air Filters for Clean Air
The air filter in your HVAC system acts as a frontline defense against airborne particles, allergens, and dust. During renovations, the increased activity can cause excess dust to accumulate within the system, potentially diminishing air quality. Here’s what you need to do:
- Check the Filter: Locate the air filter within your HVAC system. Refer to the manufacturer’s guidelines to identify its location.
- Frequency of Change: Air filters should be changed regularly, but after renovations, it’s wise to do so even sooner. Consult the manufacturer’s recommendation, but a common rule of thumb is to change it every 1 to 3 months.
- Choosing the Right Filter: Opt for high-quality filters that have a higher Minimum Efficiency Reporting Value (MERV) rating. These filters effectively capture smaller particles, improving indoor air quality.
Cleaning Vents for Optimal Airflow
Vents and registers play a crucial role in distributing conditioned air throughout your home. However, they can also become magnets for dust and debris, especially during renovations. Properly maintaining these components ensures optimal airflow and prevents dust buildup:
- Unobstructed Vents: Ensure that vents and registers are not obstructed by furniture, drapes, or other items. Blocked vents can disrupt the airflow and affect the efficiency of your HVAC system.
- Vacuuming and Wiping: Use a vacuum cleaner with a brush attachment to gently remove dust from the vent covers. You can also wipe them down with a damp cloth to eliminate residual particles.
Enlisting Professional Assistance
If your renovation involved extensive construction, consider enlisting the expertise of HVAC professionals to perform a thorough system inspection and cleaning. A professional can dislodge dust and debris from ducts, coils, and other internal components, ensuring your HVAC system operates optimally.
Breathing Fresh Air Again
Post-renovation HVAC maintenance is a commitment to the air quality and comfort of your living space. By changing air filters promptly and cleaning vents, you ensure that the air circulating within your home is clean and free from dust and allergens. This not only contributes to a healthier indoor environment but also allows you to fully enjoy the fruits of your renovation labor in the freshest and most comfortable manner possible.
Note: If you’re unsure about HVAC maintenance or need extensive cleaning, consulting HVAC professionals is highly recommended to ensure safe and effective maintenance.
Final Touches
As the curtain draws near on your post-renovation journey, there’s one last phase that holds the power to elevate your newly transformed space from good to exceptional—the final touches. These small yet impactful steps ensure that every corner of your home receives the care it deserves and that the essence of renewal permeates every inch. Here’s how to bestow your space with the finishing flourish it merits:
The Meticulous Inspection
Before you close the chapter on your renovation project, embark on a meticulous inspection that spans every nook and cranny. This is the time to address any overlooked areas that may still harbor traces of dust or debris from the construction process. Focus your attention on less visible spots such as baseboards, corners, and behind furniture.
- Light and Magnification: Employ a flashlight and perhaps even a magnifying glass to aid in your inspection. These tools reveal hidden particles that might escape the naked eye.
- Dusting and Wiping: Armed with a microfiber cloth, gently dust and wipe surfaces that require a final polish. Take your time to ensure that even the tiniest traces of dust are banished.
Bringing Nature Indoors
As your revitalized space comes to life, consider adding a touch of nature to the tableau. Indoor plants infuse rooms with vibrancy, purify the air, and contribute to a sense of tranquility. Here’s how to seamlessly incorporate these living elements:
- Selecting Plants: Choose indoor plants that thrive in the specific conditions of each room. Consider factors such as sunlight, humidity, and maintenance requirements.
- Placement: Position plants strategically to enhance the aesthetics of your space. Consider placing them near windows, on shelves, or as focal points on tables.
- Caring for Plants: Attend to the care needs of your indoor plants, including watering, pruning, and ensuring proper drainage. Healthy plants contribute to the overall ambiance of your renovated space.
Embracing the Culmination of Care
The final touches are the culmination of your dedication to your renovation project. Through the meticulous inspection, you affirm your commitment to perfection, leaving no stone unturned in your quest for a flawless environment. By inviting nature indoors, you breathe life into your space, infusing it with a touch of green vitality that complements the rejuvenation you’ve achieved.
A Space Transformed, A Journey Completed
As you stand amidst the final touches, take a moment to appreciate the transformation that has taken place. The labor of renovation, the attention to detail, and the quest for excellence have converged to create a space that resonates with renewed energy. With every detail tended to and every corner revitalized, you have not just renovated a space—you’ve crafted a haven that embodies your vision, care, and commitment to excellence.
Note: When introducing indoor plants, research their specific care requirements to ensure their health and longevity. Choose plants that align with your level of gardening expertise and the conditions of your home.
Post-Cleanup Inspection
As the finishing touches are delicately placed, a crucial step awaits—one that ensures the culmination of your renovation journey meets the highest standards of excellence. The post-cleanup inspection stands as the bridge between completion and satisfaction, offering the opportunity to catch any remaining details that may have eluded your attention. Here’s how to conduct a comprehensive inspection that leaves no stone unturned:
A Methodical Walkthrough
Embark on a methodical walkthrough of the entire renovated space. This process demands a meticulous approach, with your senses attuned to even the faintest traces of dust, debris, or overlooked spots. As you traverse each room, follow these steps:
- Lighting Enhancement: Maximize natural and artificial lighting to illuminate every corner. Adequate lighting reveals imperfections that might escape notice in dimmer conditions.
- Systematic Scan: Begin at one end of the space and systematically scan the area. Your goal is to inspect every surface, fixture, and feature, no matter how seemingly inconspicuous.
Attention to Detail
During your inspection, focus on the finer details that contribute to a polished finish:
- Edges and Corners: Pay particular attention to edges and corners, where dust can accumulate. Use a flashlight to illuminate these areas and ensure they’re free from residue.
- Furniture and Fixtures: Inspect furniture, fixtures, and appliances for any lingering dust or smudges. Give extra attention to handles, knobs, and surfaces that are frequently touched.
- Flooring: Examine flooring for any traces of debris or footprints. Ensure carpets are thoroughly vacuumed and hard surfaces are clean and streak-free.
Promptly Addressing Concerns
Should you encounter any areas of concern during your inspection, address them promptly. Have a microfiber cloth, appropriate cleaning solution, and any necessary tools at hand to immediately tend to any spots that require attention. By addressing concerns as they arise, you ensure that your inspection is not only thorough but also effective in achieving the desired level of cleanliness and presentation.
A Seal of Excellence
The post-cleanup inspection represents the seal of excellence on your renovation project. It’s a testament to your unwavering commitment to quality, precision, and attention to detail. By conducting a comprehensive walkthrough, you solidify your role as both creator and curator of a space that resonates with renewed beauty and functionality.
An Achievement Celebrated
As you conclude the post-cleanup inspection, take a moment to celebrate the journey you’ve undertaken. The renovation process is not just about transformation—it’s about the dedication, care, and artistry that you’ve invested in every brushstroke, every decision, and every meticulous act of cleaning. The culmination of your efforts stands before you, a reflection of your commitment to excellence and a space that embodies your vision.
Note: A post-cleanup inspection is not just about aesthetics—it also ensures the safety and comfort of your living space. Address any issues that might compromise these factors promptly.
Long-Term Maintenance Tips
As the echoes of renovation fade, and your newly transformed space basks in its newfound glory, the question of maintaining this splendor over the long term becomes paramount. To ensure that the post-renovation sparkle remains undiminished, it’s crucial to embrace effective long-term maintenance strategies. By regularly caring for your space, you not only preserve its aesthetic appeal but also create a harmonious environment that reflects the care and dedication you’ve poured into it. Here’s how to implement these strategies:
Consistent Cleaning and Decluttering
A consistent cleaning and decluttering routine forms the cornerstone of long-term maintenance:
- Dust Prevention: Regularly dust surfaces to prevent the accumulation of dust and allergens. This practice not only maintains cleanliness but also contributes to indoor air quality.
- Decluttering Rituals: Make decluttering a regular habit. Regularly assess items in your space and remove those that no longer serve a purpose. A clutter-free environment is easier to clean and more inviting.
Establish Cleaning Schedules
To maintain the beauty of your renovated space, create and adhere to a cleaning schedule:
- Daily Touch-Ups: Incorporate daily routines such as quick wipes of countertops, sweeping, and tidying up. These small actions prevent messes from accumulating and becoming daunting to tackle.
- Weekly Deep Cleans: Set aside a specific day each week for deeper cleaning tasks, such as vacuuming, mopping, and dusting all surfaces. Rotate through different areas to ensure comprehensive coverage.
- Monthly Maintenance: On a monthly basis, delve into more specific tasks. Clean windows, vents, and overlooked corners. Inspect and address any potential maintenance issues.
Preservation through Prevention
Beyond cleaning, implementing prevention strategies helps preserve your renovated space:
- Protective Measures: Use protective mats or rugs in high-traffic areas to prevent excessive wear on flooring. Invest in furniture pads to prevent scratches on surfaces.
- Air Quality Maintenance: Regularly change HVAC filters and ensure proper ventilation to prevent dust and allergens from accumulating.
- Mindful Usage: Encourage family members or occupants to be mindful of their actions. Remind them to use coasters, avoid placing hot items directly on surfaces, and handle items with care.
A Testament to Dedication
Long-term maintenance is a testament to the dedication you’ve invested in your renovation project. By establishing and adhering to cleaning routines, you extend the vibrancy of your space and continue to enjoy the fruits of your labor. The reflection of your care shines through in the well-maintained environment you’ve created.
A Legacy of Beauty
As you commit to long-term maintenance, you create a legacy of beauty and functionality. The space you’ve so meticulously designed and cared for becomes a canvas where daily life unfolds. Each brushstroke, each cleaning ritual, contributes to the masterpiece that is your home—a space that embodies your dedication and your vision.
In Conclusion…
Completing a DIY renovation project is an accomplishment to be proud of, but the work doesn’t end with the final nail hammered in or the last brushstroke. Proper cleanup is an essential part of the process, ensuring your home shines as brilliantly as your vision. By following these post-renovation cleaning tips, you’ll not only restore order but also create a clean and inviting environment that perfectly complements your creative efforts.


